
There are two main parts to making this device easy to use. The first part is connecting it to your network. The following is not a screenshot of the standard Android network selection interface. It's a web interface served out by the ESP32 in order to make it as easy to connect the device to a WiFi network as it is to do the same with your phone.
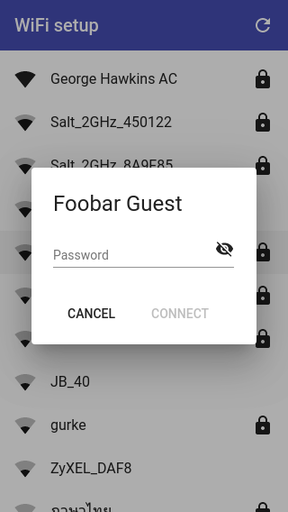
As you may know, MicroPython on the ESP32 supports both an access point (AP) mode (where it behave as an AP that you can connect to) and a station (STA) mode (where it connects to an existing network). If this device cannot connect to an existing network, it creates an open AP that you can connect to and serves out the web interface shown above. Normally, when you create an access point like this, the client that connects to it still has to find the IP address of the device and then connect to that to access such an interface. The clever thing with this project is that it uses your system's captive-portal detection to connect you directly to the web interface when you connect to the MicroPython AP. Captive-portal detection is the same thing that pushes you to the login interface when you connect to public WiFi in places like coffee shops and airports. In this case, instead of a login page, you're presented with a web interface that shows you the networks that the device can see and lets you select the one to which you want to connect it.
The second part of making things easy to use is to provide a nice interface for controlling the device once it's connected to the desired network.
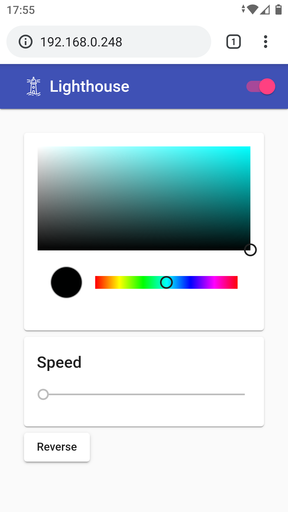
Here, things are much easier than with the WiFi setup interface. The HTML etc. for the WiFi setup interface has to be stored locally on the device as, at this point, it has no access to the internet. However, once set up, the web interface for working with the device can be stored remotely (e.g. on GitHub). This saves storage and is also much quicker to load (GitHub being much quicker at serving web pages than an ESP32). A tiny main page for the interface above is retrieved by the device from GitHub and then served out to any requesting client. Then all other requests, related to loading the page, go directly to GitHub. The device serves out the main page (rather than simply doing a redirect) so that all subsequent Javascript etc. sees the device, rather than GitHub, as the origin. This is also important for all the rules related to insecure content loading secure content and vice-versa. It's fine for the device to serve out the main page via HTTP and then include content from GitHub via HTTPS. The opposite is not true, i.e. secure content cannot go on to include insecure content. This is important as the web interface, once served out and running in the client web browser, communicates with the device via a websocket. The websocket connection is insecure, i.e. uses ws:// rather than wss://, and for this to be allowed by the client browser the containing page also has to have been served insecurely.
In the interface above, you can control:
- The brightness and color of the lighthouse light (it uses an RGB LED).
- The speed at which the motor turns.
- The direction the motor turns.
For more on this project see micropython-lighthouse-controls on GitHub.
I already covered the WiFi-setup portion of things in this earlier post and you can find more about it the micropython-wifi-setup repo on GitHub.
I hope this work helps others share their projects with people who might otherwise be put off by having to set up and control a device via a console interface.