Write in front: When connected to the network, serial port diagram transmission cannot be called diagram transmission, but should be renamed diagram transmission. First, the bandwidth of ESP01S can no longer support high frame rate image transmission. Second, in practical application, it is not necessary to continuously transmit images. It is enough to transmit only one image when necessary. As the last part of serial port diagram transmission, this chapter will implement HTTP POST in two ways. This chapter requires you to have a POST interface to test, which requires a certain foundation. This chapter will end with the Django-based post interface code.
POST (theory implementation)
Before using post, let's take a look at HTTP.
So what does HTTP have to do with TCP?What is HTTP? Hypertext Transfer Protocol (HTTP) is designed to ensure the communication between client and server. HTTP works as a request-response protocol between a client and a server. The web browser may be the client, and the network application on the computer may also act as the server. For example, the client (browser) submits an HTTP request to the server; The server returns a response to the client. The response contains status information about the request and what may be requested.
Therefore, we can simply implement HTTP based on TCP, which will be discussed in detail in this section.TCP is the underlying communication protocol. HTTP, which defines the mode of data transmission and connection, is the application layer protocol. The data in HTTP, which defines the content of data transmission, is transmitted using TCP protocol. Therefore, supporting HTTP must support TCP.
POST MessageTwo HTTP request methods, GET and POST, are most commonly used when requesting-responding between client and server: GET and POST.GET - Requests data from a specified resource.POST - Submits data to the specified resource for processing.
Simply put, GET and POST are also implemented by SOCK, and just like the preamble frames in previous chapters, they can be implemented by constructing a message. One of the simplest GET and POST messages is as follows:
Code: Select all
get_request_info = b"""GET /index HTTP/1.1
Host: 127.0.0.1:9000

"""
post_request_info = b'''POST /index HTTP/1.1
Host: 127.0.0.1:8888
Content-Type: application/x-www-form-urlencoded
Content-Length: 28

username=abc&hobby=1&hobby=2''Code: Select all
'''获取图片数据'''
img = sensor.snapshot()
img = img.compress(quality=50)#压缩图片为jpg,质量为10%
img_size=img.size()
img_bytes=img.to_bytes()
 '''Build a message'''
post_request_info = b'''POST /photo/ HTTP/1.1
Host: 127.0.0.1:80
FILENAME:JPG
Content-Type: application/multipart/form-data
Content-Length: '''
usrname=b'''

'''
post_bytes=post_request_info+str(img_size)+usrname''POST/photo/ HTTP/1.1'specifies the protocol method, post path, HTTP version.
"Host: 127.0.0.1:80" Specifies the host to access the server, usually by filling in the server top-level domain name directly, such as "www.baidu.com".
"FILENAME:JPG"Is the custom header content, optional.On my server side, it identifies the file format sent (which also means that any file can be submitted)
"Content-Type" specifies the format of the message content.For binary data, use "application/multipart/form-data".
"Content-Length:" is necessary to indicate the length of data we are sending next so that the connection is closed after receiving a fixed length of data (http is actually a short TCP link, so in order to maintain the connection, a heartbeat packet appears.)
"Usrname" is actually a line break/r/n that tells the server that the header is over and then the message content.
Connect sock
Socks are typically connected directly to fixed-end IP, but 99% of the time POST specifies a web address.Use hereSocket.getaddrinfoTo get the IP and port.
Code: Select all
sock = socket.socket()
addr = socket.getaddrinfo("localhost", 80)[0][-1]
sock.connect(addr)Submit data
After the message has been sent out, the next step is to send the message content.As in the previous chapter, send directly using sock.
Code: Select all
block = int(len(img_bytes)/2048)
    for i in range(block):
       sock.send(img_bytes[i*2048:(i+1)*2048])
       sock.send(img_bytes[block*2048:])
Complete Code
Code: Select all
# Untitled - By: Lithromantic - 周二 3月 9 2021
from fpioa_manager import fm
fm.register(10, fm.fpioa.UART1_TX, force=True)
fm.register(9, fm.fpioa.UART1_RX, force=True)
from machine import UART
import sensor, image, time,network
import socket
ssid="1234"
key="11111111"
ADDR = ("192.168.137.1", 80)
uart_A = UART(UART.UART1, 115200, 8, 1, 0, timeout=1000, read_buf_len=4096)
net=network.ESP8285(uart_A)
net.connect(ssid, key)
print(net.ifconfig())
sock = socket.socket()
sock.connect(ADDR)
sock.settimeout(10)

sensor.reset()
sensor.set_pixformat(sensor.RGB565)
sensor.set_framesize(sensor.QVGA)
sensor.skip_frames(time = 2000)

post_request_info = b'''POST /photo/ HTTP/1.1
Host: 127.0.0.1:80
FILENAME:JPG
Content-Type: application/multipart/form-data
Content-Length: '''
usrname=b'''

'''
while (True):
    img = sensor.snapshot()
img = img.compress(quality=50)#压缩图片为jpg,质量为10%Server side response:
Code: Select all
JPG
[14/Mar/2021 18:18:44] "POST /photo/ HTTP/1.1" 200 79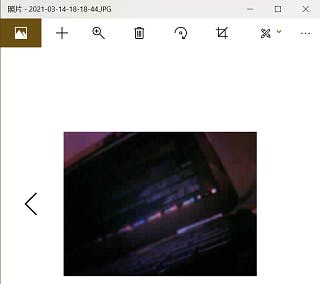
view.py
Code: Select all
from django.views.decorators.csrf import csrf_exempt
from django.http import HttpResponse
import re
import os
import datetime
BASE_DIR = os.path.dirname(os.path.dirname(os.path.abspath(__file__)))
@csrf_exempt
def hello(request):
    return HttpResponse("\r\nHello world ! \r\n")
@csrf_exempt
def runoob(request):
  if request.method == 'GET':
    return HttpResponse('请提交图片')
  if request.method == 'POST':
    filename = request.META.get("HTTP_FILENAME")
    print(filename)
    myFile =request.body
    if not myFile:
        return HttpResponse("no files for upload!")
    if myFile:
        dir = os.path.join(BASE_DIR,'photo')
        nowtime=datetime.datetime.now().strftime('%Y-%m-%d-%H-%M-%S')
        files = '{}.{}'.format(nowtime,filename)
        destination = open(os.path.join(dir, files),
                  'wb+')
        destination.write(myFile)
        destination.close()
    return HttpResponse('ok,图片储存在:{},图片名为:{}'.format(dir,filename))
@csrf_exempt
def runoob1(request):
    #name = request.POST.get("User-Agent")
    name = request.META.get("HTTP_USER_AGENT")
return HttpResponse('姓名:{}'.format(name))Code: Select all
"""web URL Configuration

The `urlpatterns` list routes URLs to views. For more information please see:
    https://docs.djangoproject.com/en/3.1/topics/http/urls/
Examples:
Function views
    1. Add an import:  from my_app import views
    2. Add a URL to urlpatterns:  path('', views.home, name='home')
Class-based views
    1. Add an import:  from other_app.views import Home
    2. Add a URL to urlpatterns:  path('', Home.as_view(), name='home')
Including another URLconf
    1. Import the include() function: from django.urls import include, path
    2. Add a URL to urlpatterns:  path('blog/', include('blog.urls'))
"""
from django.contrib import admin
from django.urls import path
from . import view
urlpatterns = [
    path('hello/', view.hello),
    path('post/',view.runoob1),
    path('photo/',view.runoob),
]